
I’ve been wanting to pull of a DIY chalkboard for the longest time, and finally this project has come to fruition! I’m not even sure where the original source of my craze came from, but I started pinning some tips and ideas to pinterest late last year, like this one (not sure of the original source):

I thought one above my fireplace would also look great, but later changed my mind and decided I’d rather have it in my breakfast area instead. I finally stumbled on a suitable frame at a thrift store, and purchased my supplies – spray paint for the frame and chalkboard paint for the interior. I had read that you could paint right over the frame glass, so that was my first attempt. Sadly, it failed after 3 coats of paint (the paint wasn’t adhering properly, and eventually the glass just broke!).
After getting past my frustration, I purchased some thin board at Lowe’s in what I *thought* was cut to the correct size. Once I started to paint it, I realized the unfortunate measurement error. After more waiting to get past annoyance and frustration, another visit to Lowe’s, and this time a properly cut piece of board, I finally started more chalkboard painting. This time I went for just 2 coats (using a foam roller). It worked great!
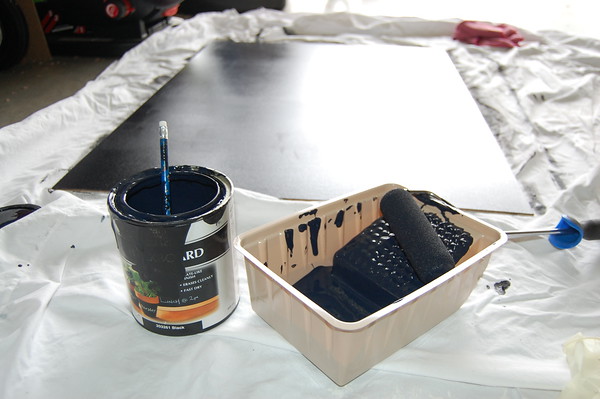
Simple supplies – 2 coats, let it thoroughly dry, then rub chalk sideways across the board to “prime” it for use
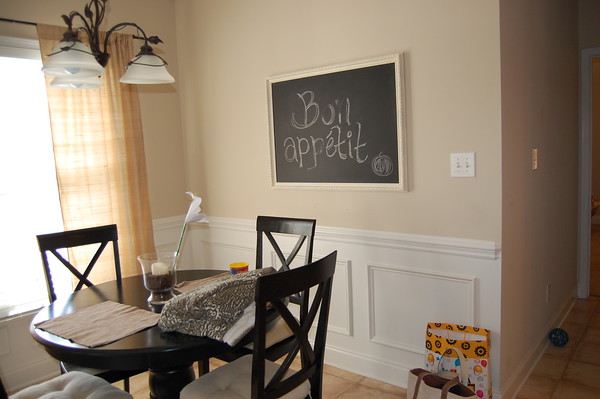
Here it is hanging in my breakfast area. I’m still getting used to it, and almost debated pulling it down, but it’s growing on me, and also a friend showing me this awesome dust-less chalk pen product swayed my decision:

My board in the above pic has regular chalk, but I’ve ordered a pen to use going forward! Thanks to Abby for the tip! :)
Now just to work on getting my chalkwriting penmanship a bit cuter….


No comments:
Post a Comment